how to curl hair quickly for travel comes down to two things: choosing a method that fits your luggage and using a routine that holds up through planes, cars, and changing humidity.
If you have ever landed, checked into a hotel, and realized your hair needs “something” before dinner, you already know the pain, you want curls fast, but you also want your hair to still feel like hair tomorrow.
This guide keeps it practical: quick curling options that work in tight bathrooms, a small packing list, time-saving steps, and a few hold tricks that matter more than people think.
Pick the fastest curl method for your trip (and your hair)
The “best” travel curl method is usually the one you can set up in under 2 minutes, and redo in under 5 if the first side looks weird. Here are the realistic options.
Option A: Compact curling wand or iron (fastest results)
- Best for: medium to thick hair, blunt cuts, hair that resists heatless styles
- Time: 6–15 minutes depending on length and how picky you are
- Tradeoffs: needs power, heat protection, and safe storage
For travel, look for a smaller barrel and a simple temperature dial. If you are hopping countries, dual-voltage matters, otherwise you risk frying the tool or your hair.
Option B: Heatless curls (best when outlets, time, or hair health are issues)
- Best for: fine hair, damaged hair, overnight travel, early mornings
- Time: 5–10 minutes to set, then you let it “cook” while you do other things
- Tradeoffs: results vary by hair texture and how damp your hair is
Heatless methods are also the least stressful in a shared hotel bathroom. No cords, no “is this plug safe,” and no waiting for a tool to cool down.
Option C: “Emergency curls” with what you already packed
- Best for: last-minute texture, ends that flip out, bangs, face frame
- Tools: braids, twists, sock, robe belt, clips, or even a clean scarf
If you just need movement, a couple of twists pinned up while you shower can be enough. The goal is believable, not perfect.
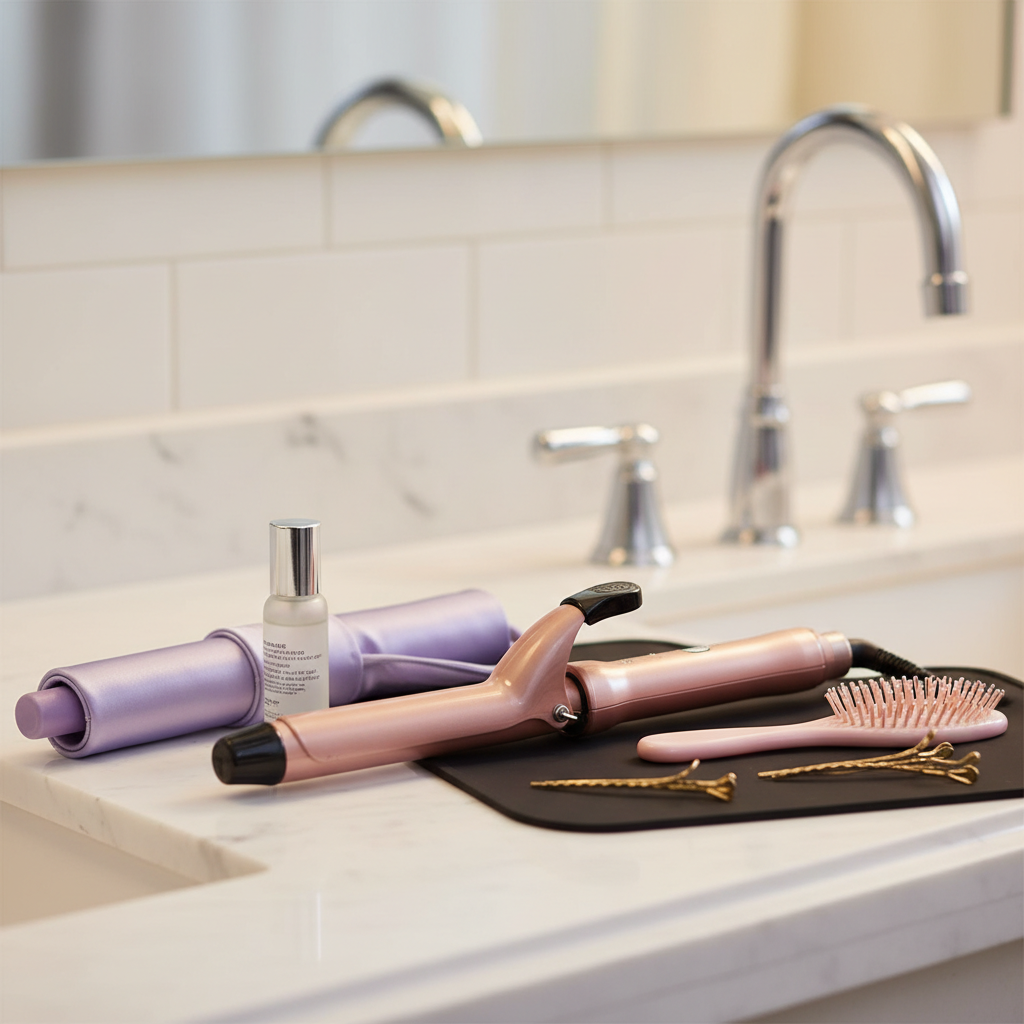
Pack smart: the mini kit that actually saves time
When people ask how to curl hair quickly for travel, they often focus on the tool, but the speed comes from having the right small extras so you are not improvising with hotel hand towels.
| Item | Why it matters | Travel-friendly tip |
|---|---|---|
| Heat protectant | Helps reduce heat-related damage and frizz | Decant into a 1–2 oz spray bottle |
| 2–4 sectioning clips | Faster, cleaner sections equals faster curls | Flat claw clips or metal duckbill clips |
| Mini hairspray or styling mist | Hold that survives transit and humidity shifts | Look for flexible hold, not helmet hair |
| Heat-resistant mat or glove | Prevents counter damage and rushed burns | Silicone mat folds into almost nothing |
| Wide-tooth comb | Detangles without blowing up frizz | Choose a small, sturdy one |
According to the American Academy of Dermatology Association, using a heat protectant and keeping heat settings reasonable can help reduce hair damage from hot tools, which matters more when you are styling on consecutive travel days.
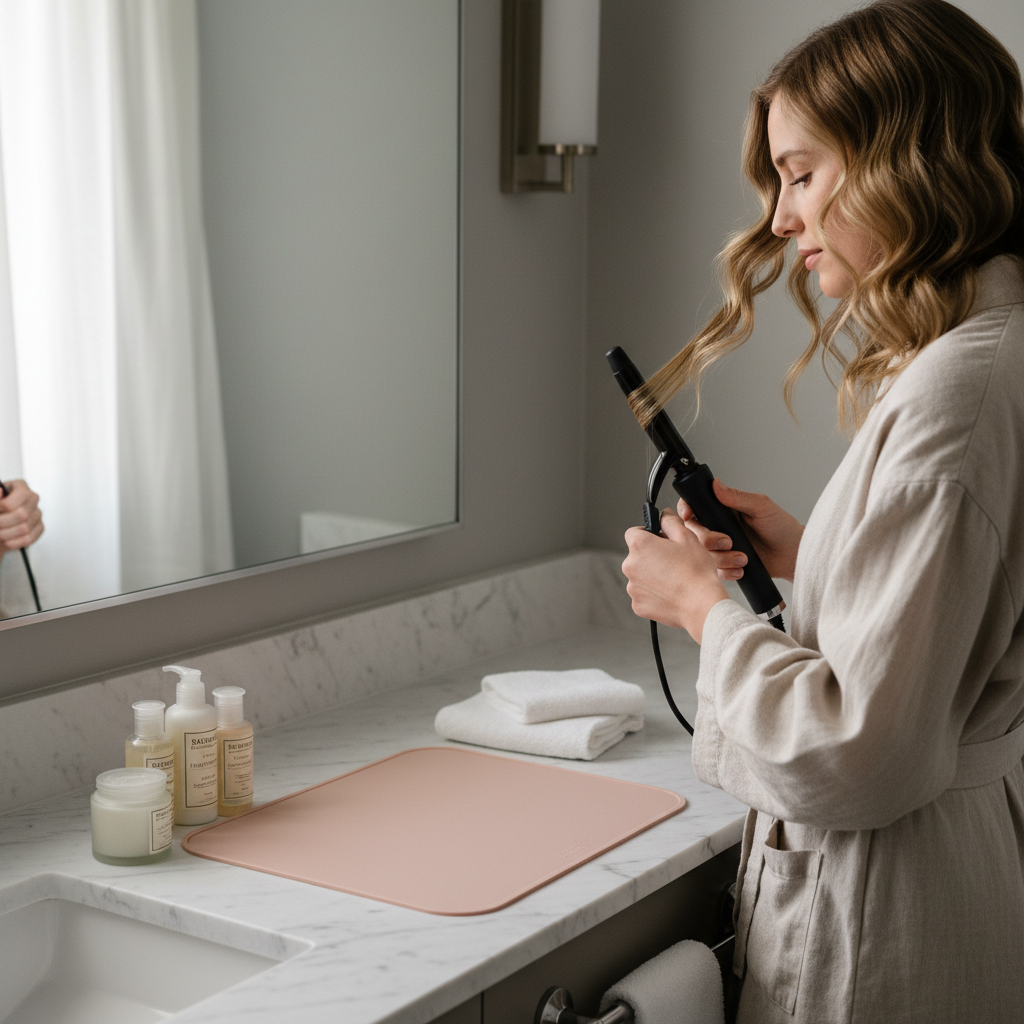
A 10-minute hot-tool routine that works in most hotel bathrooms
This is the routine I recommend when time is tight and you still want a polished curl. It is designed to be forgiving, even if the bathroom lighting is bad.
Step 1: Start with “almost dry” hair
If hair is damp, curls often fall fast and you end up reheating sections, which wastes time. Blow-dry the roots and the first few inches, then let the ends stay slightly cool and dry to the touch.
Step 2: Do bigger sections than you think you should
For travel curls, aim for 6–10 sections total on long hair, fewer on shorter cuts. You want volume and shape, not tiny ringlets that take forever.
Step 3: Use the “two-second clamp” for speed
- Wrap the section once or twice around the barrel
- Hold 5–10 seconds depending on hair thickness, not 20
- Let the curl cool in your palm for a moment, then drop
Cooling is underrated. If you do not let curls set briefly, you can get the look but lose the wear time.
Step 4: Set the shape before you leave the bathroom
Spritz a light hold product from a bit of distance, wait 30 seconds, then separate curls with fingers. If you brush immediately, you will flatten everything into “airport hair.”
Heatless curls on the road: quick setup, surprisingly good payoff
If your trip involves early call times, shared rooms, or you just want to avoid heat, heatless is often the easiest way to curl hair quickly for travel because the time happens while you sleep or commute.
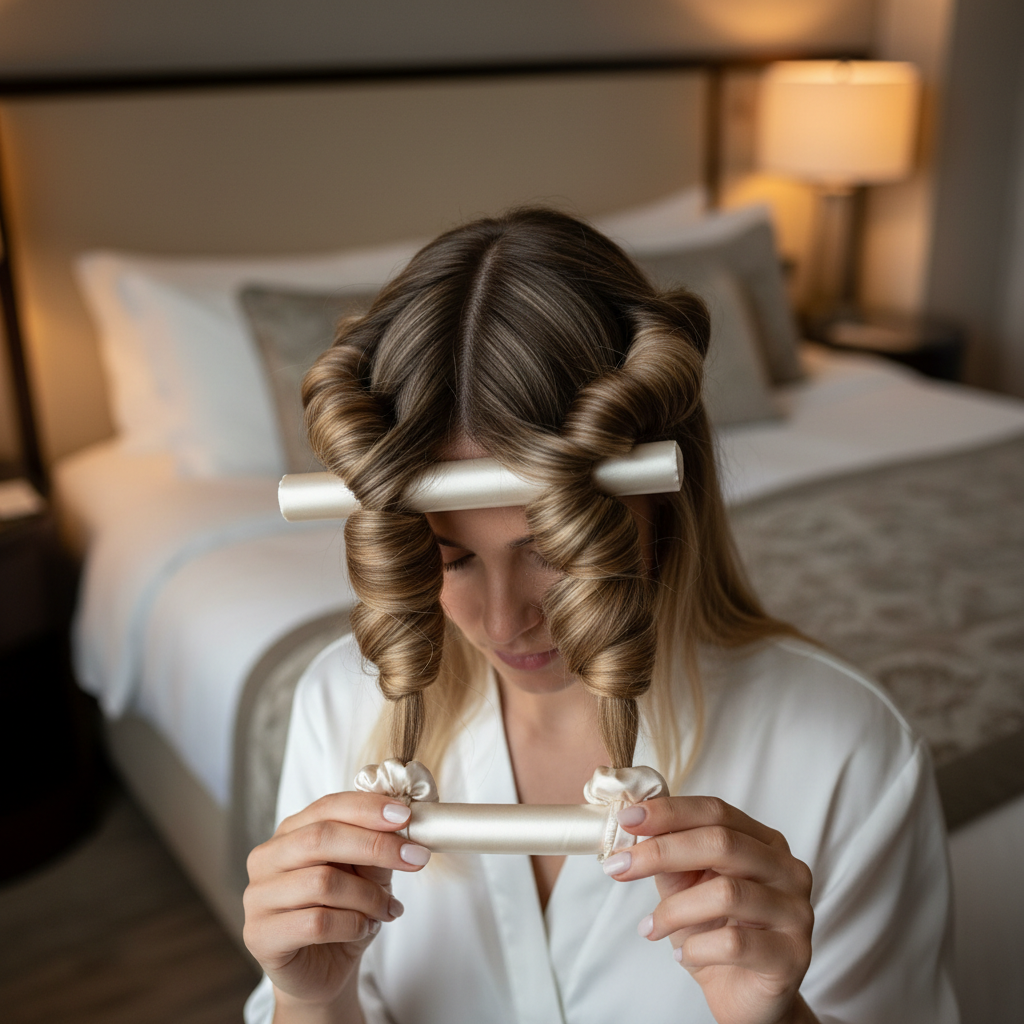
Method 1: Satin rod or robe-belt curls (best for soft waves)
- Start with hair that is slightly damp, not wet
- Wrap away from the face on both sides
- Secure ends well, loose ends become frizz ends
In dry hotel air, add a tiny bit of leave-in conditioner to ends before wrapping, otherwise curls can look puffy rather than smooth.
Method 2: Two-braid waves (best for beginners)
- Center part, make two braids
- Make them medium-tight, not scalp-tight
- Sleep, then finger-comb in the morning
This method is not glamorous, but it is dependable and easy to redo if one side gets crushed during sleep.
Make travel curls last: hold tricks that matter more than extra heat
Long-lasting curls usually come from prep and finishing, not from cranking the temperature. A few small choices can add hours.
- Use less conditioner on travel days, especially near the roots, too much slip makes curls drop.
- Style in layers, do the bottom layer fully, then the top, skipping layers creates random flat spots.
- Pin-to-cool for stubborn hair, clip a curl up for 2 minutes while you do makeup, then release.
- Pack humidity insurance, a travel anti-frizz cream or light hair oil for flyaways, used sparingly.
If your hair goes limp fast, try curling in alternating directions. It looks more natural and tends to hold shape better through movement.
Common travel mistakes that waste time (and how to avoid them)
Most curl “fails” on trips are predictable. Fixing them is usually faster than changing your whole method.
- Using hotel shampoo that is too heavy: if hair feels coated, do a smaller curl and add texture spray, heavy-clean hair drops curls quickly.
- Overheating to compensate: more heat can mean more shine at first, but also more frizz later, especially in dry cabin air.
- Touching curls nonstop: hands warm up hair and pull it out of shape, set it, cool it, then leave it alone.
- Forgetting a safe place to set a hot tool: that rushed moment is when burns and counter damage happen, a mat helps.
Also, watch the outlet situation. If you travel internationally, mismatched voltage can damage tools and create safety risks, if you are unsure, check the tool label or ask a professional stylist what to buy for your destinations.
Quick decision checklist: what should you do today?
Use this to decide in 30 seconds, instead of staring at your bag hoping the right tool appears.
- If you have 10–15 minutes and stable power, go with a compact wand or iron.
- If you have 5 minutes now and time later, set heatless curls and let them form while you move.
- If hair is already styled but flat at the ends, do 4–6 face-framing sections only.
- If hair feels dry or damaged, lower heat and lean on pin-to-cool plus flexible hold spray.
- If humidity is high, prioritize anti-frizz finishing over making tighter curls.
Key takeaways and a simple action plan
how to curl hair quickly for travel is less about perfection and more about a repeatable routine: choose one method you can do half-asleep, pack a tiny kit that prevents delays, and focus on cooling and hold so curls survive the day.
For your next trip, pick one primary method and one backup, then do a quick test run at home with the exact products you plan to pack, that single practice session usually saves the most time later.